Replace Hidden Fonts in PowerPoint: Find and Remove Stubborn Embedded Fonts
November 29, 2023
/
1 min
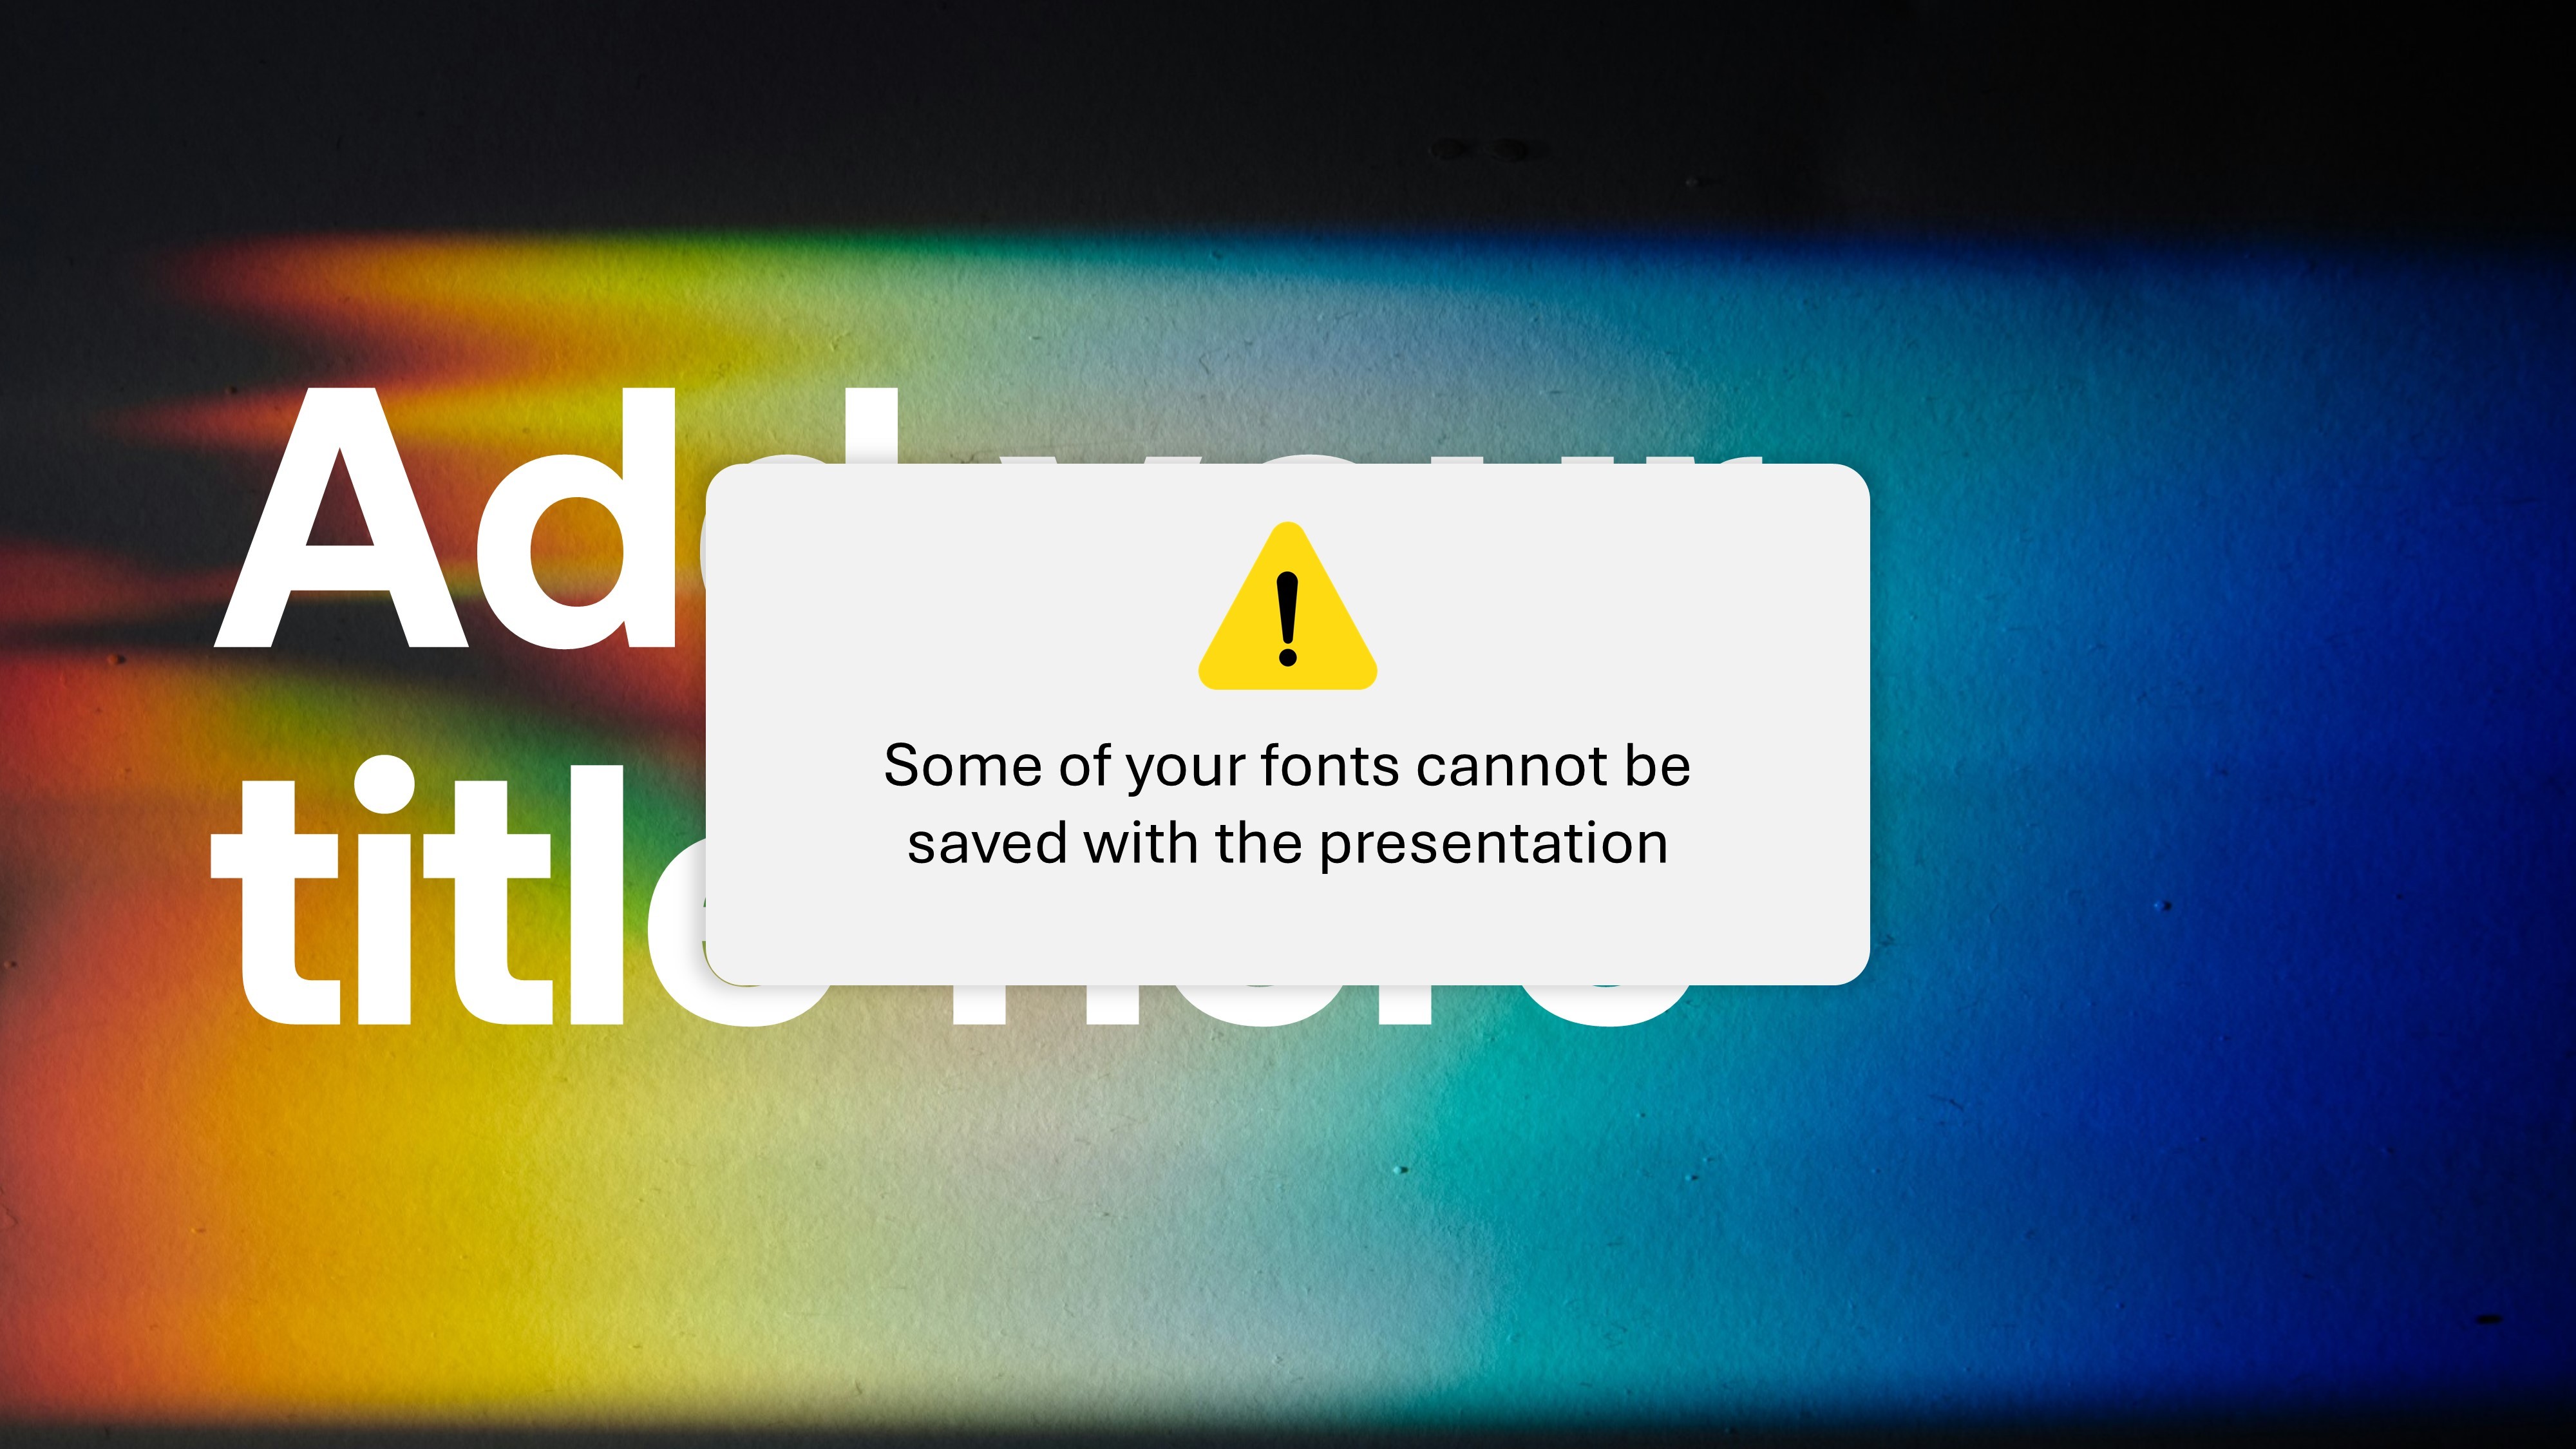

Sometimes fonts in our PowerPoint files seem to have a mind of their own. Even after you've tried replacing them multiple times, they just won’t disappear. These hidden or embedded fonts can cause annoying error messages when saving or sharing your presentation. But don’t worry, we have a trick that will solve this issue once and for all.
Step-by-Step Workaround to Replace Stubborn Fonts
Let’s say you have a presentation with two fonts: Arial and Poppins. You only want to keep Arial, but Poppins won’t go away despite your efforts to replace it. Here’s a detailed workaround to fix this.
Basic Font Replacement
Before we dive into the advanced workaround, try the basic font replacement method:
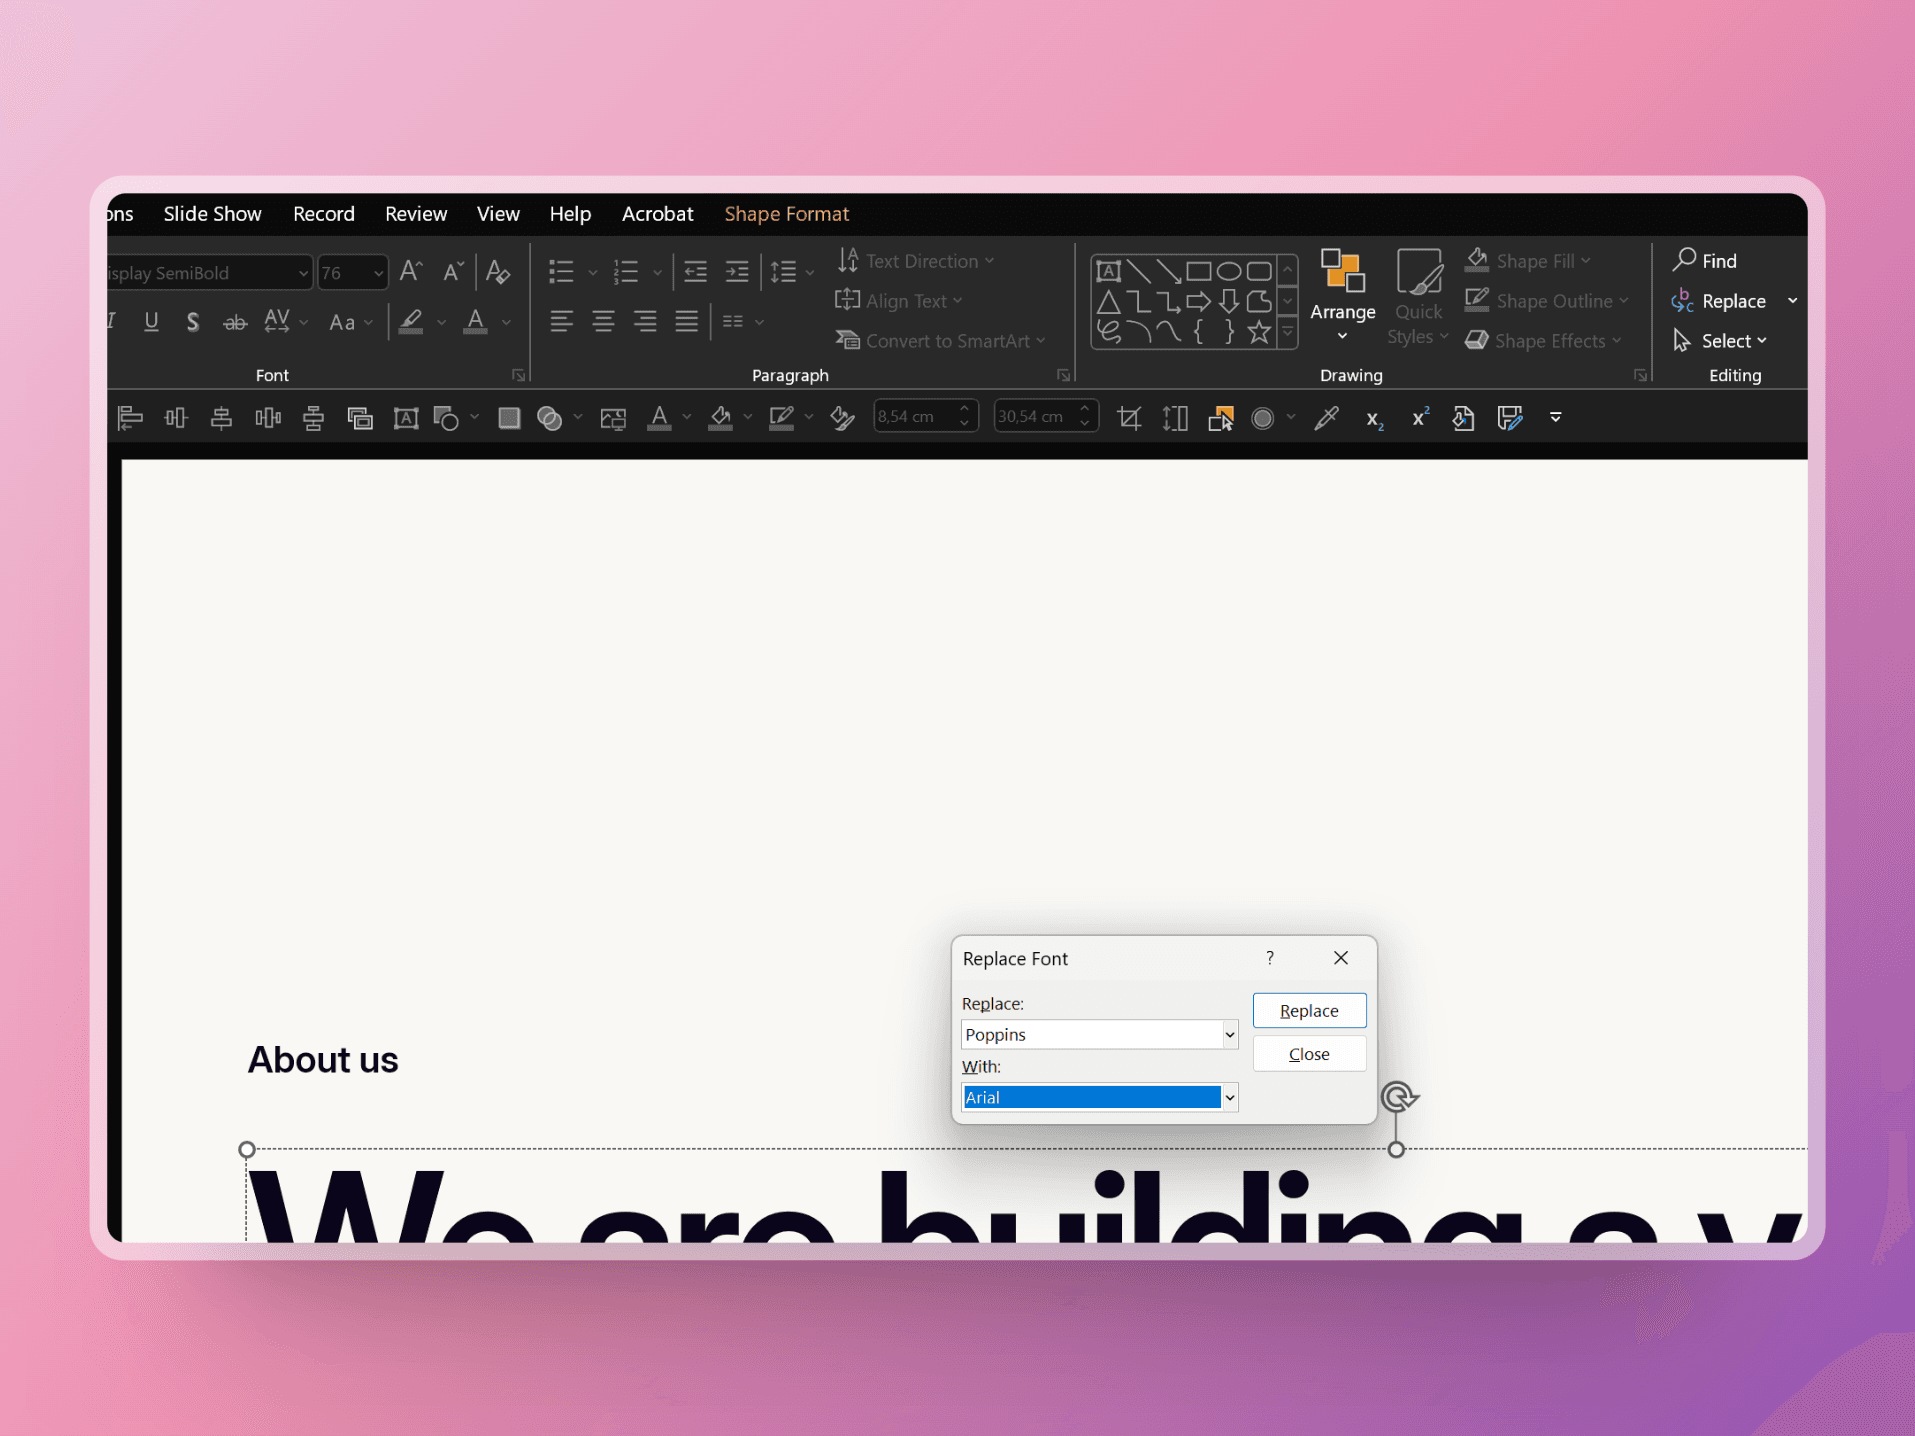
Replace Fonts:
Go to the
Hometab.Click on
Replacein theEditinggroup.Select
Replace Fonts.Replace Poppins with Arial.
If this doesn’t work, proceed with the XML method below.
Workaround Method: Using XML to Remove Stubborn Fonts
First of all,
create a backupof your PowerPoint presentation (just in case something goes wrong).Save the Presentation as an XML File:
Open your PowerPoint file.
Go to
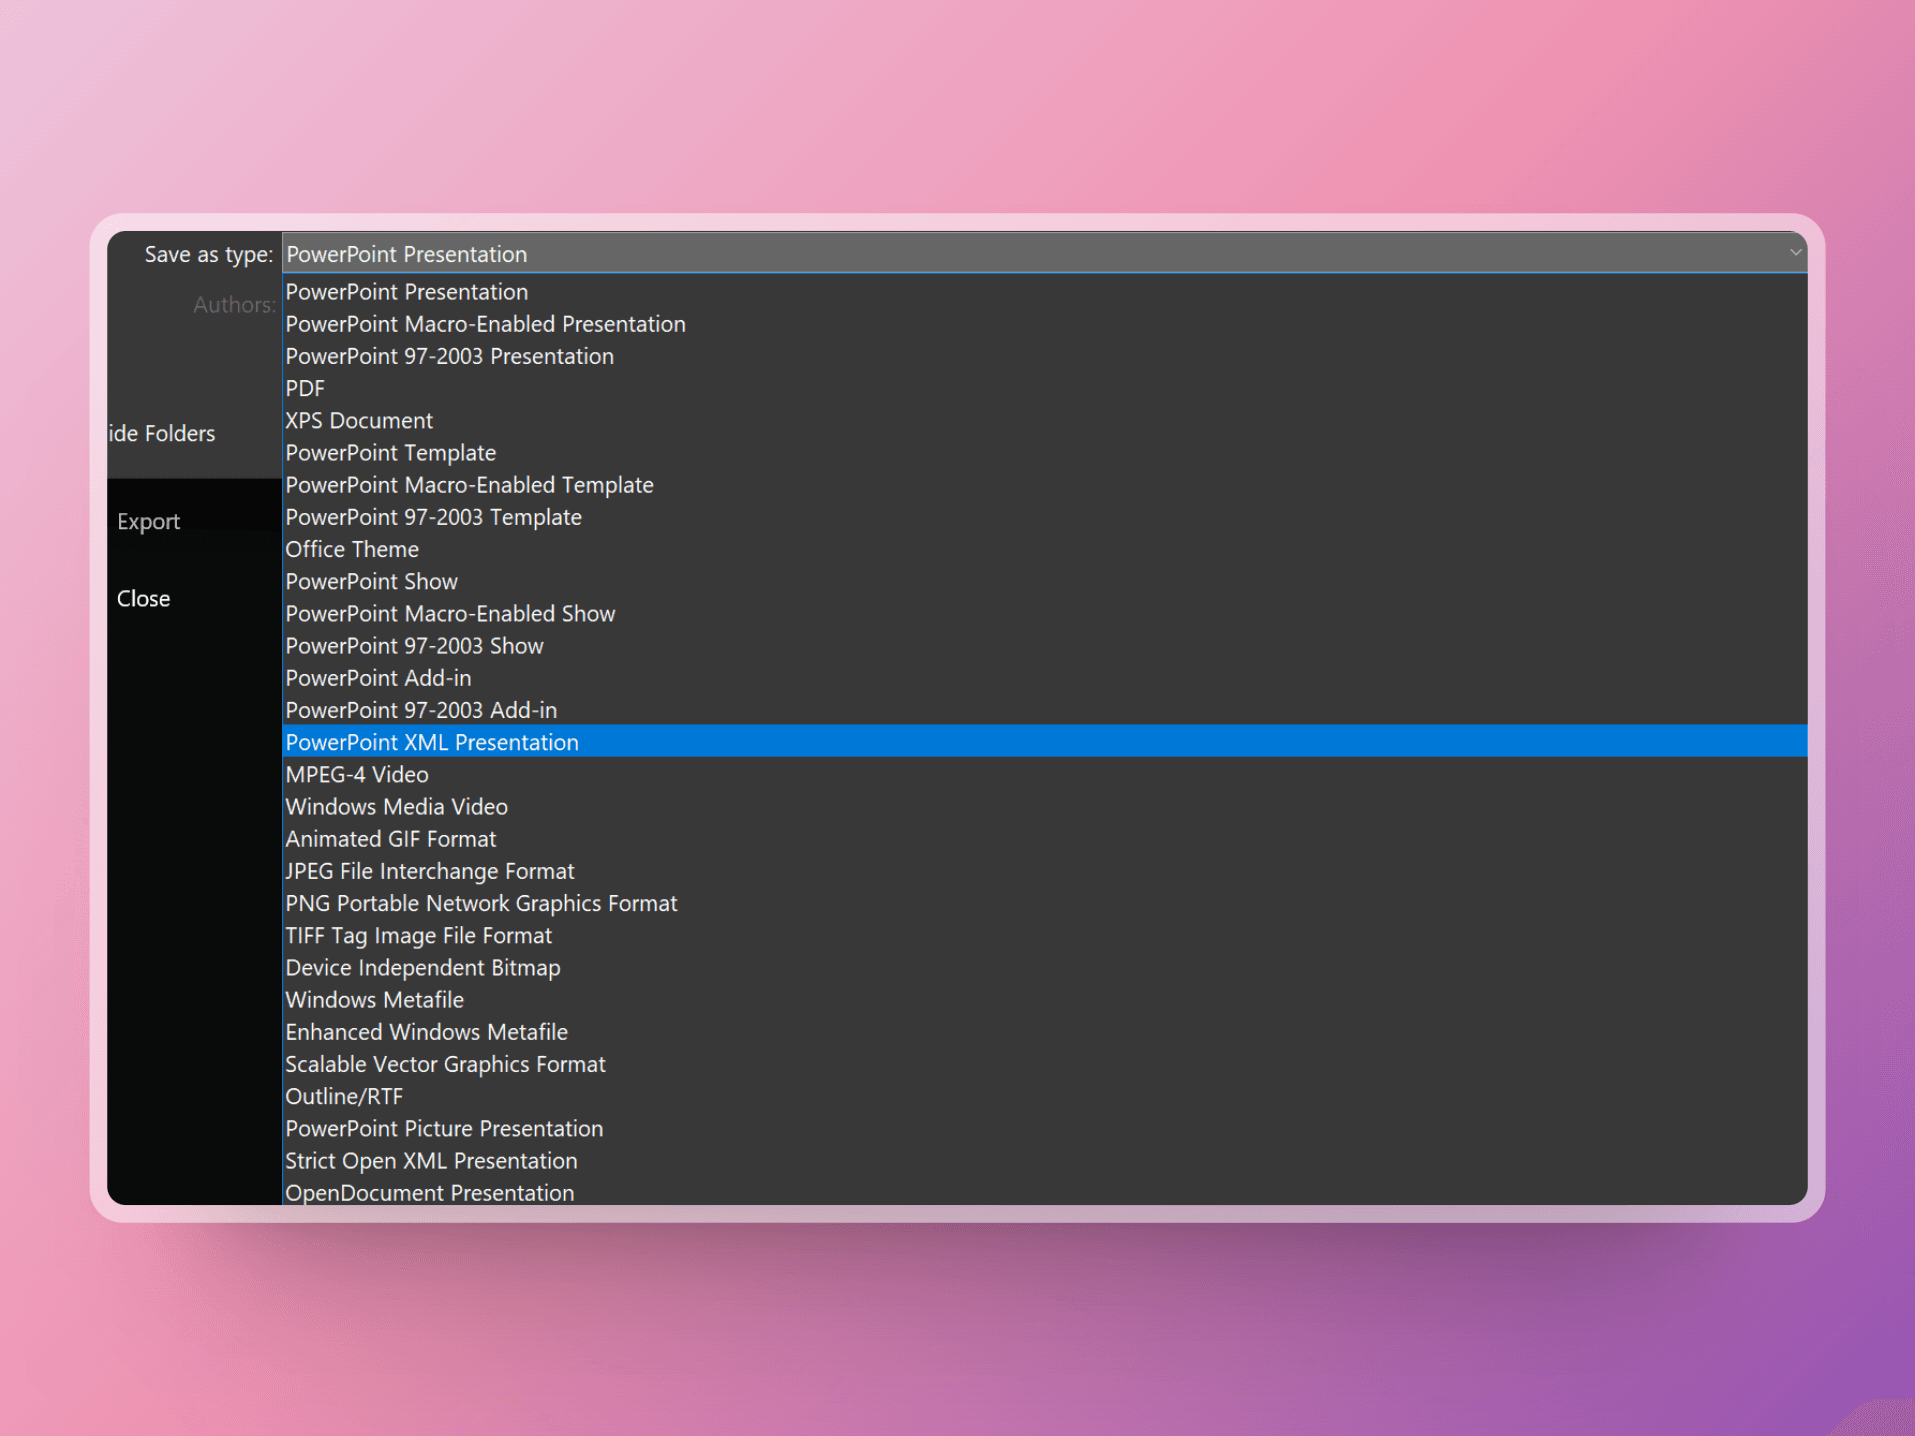
File>Save As.Choose a location and set the file type to
PowerPoint XML Presentation (*.xml).Savethe file.
Edit the XML File:
Close your PowerPoint file
Open the saved XML filein a text editor like Microsoft Notepad (right-click the XML file and open in Notepad).Once opened (it looks a bit scary but don't worry), go to
Replaceunder the Edit tab,
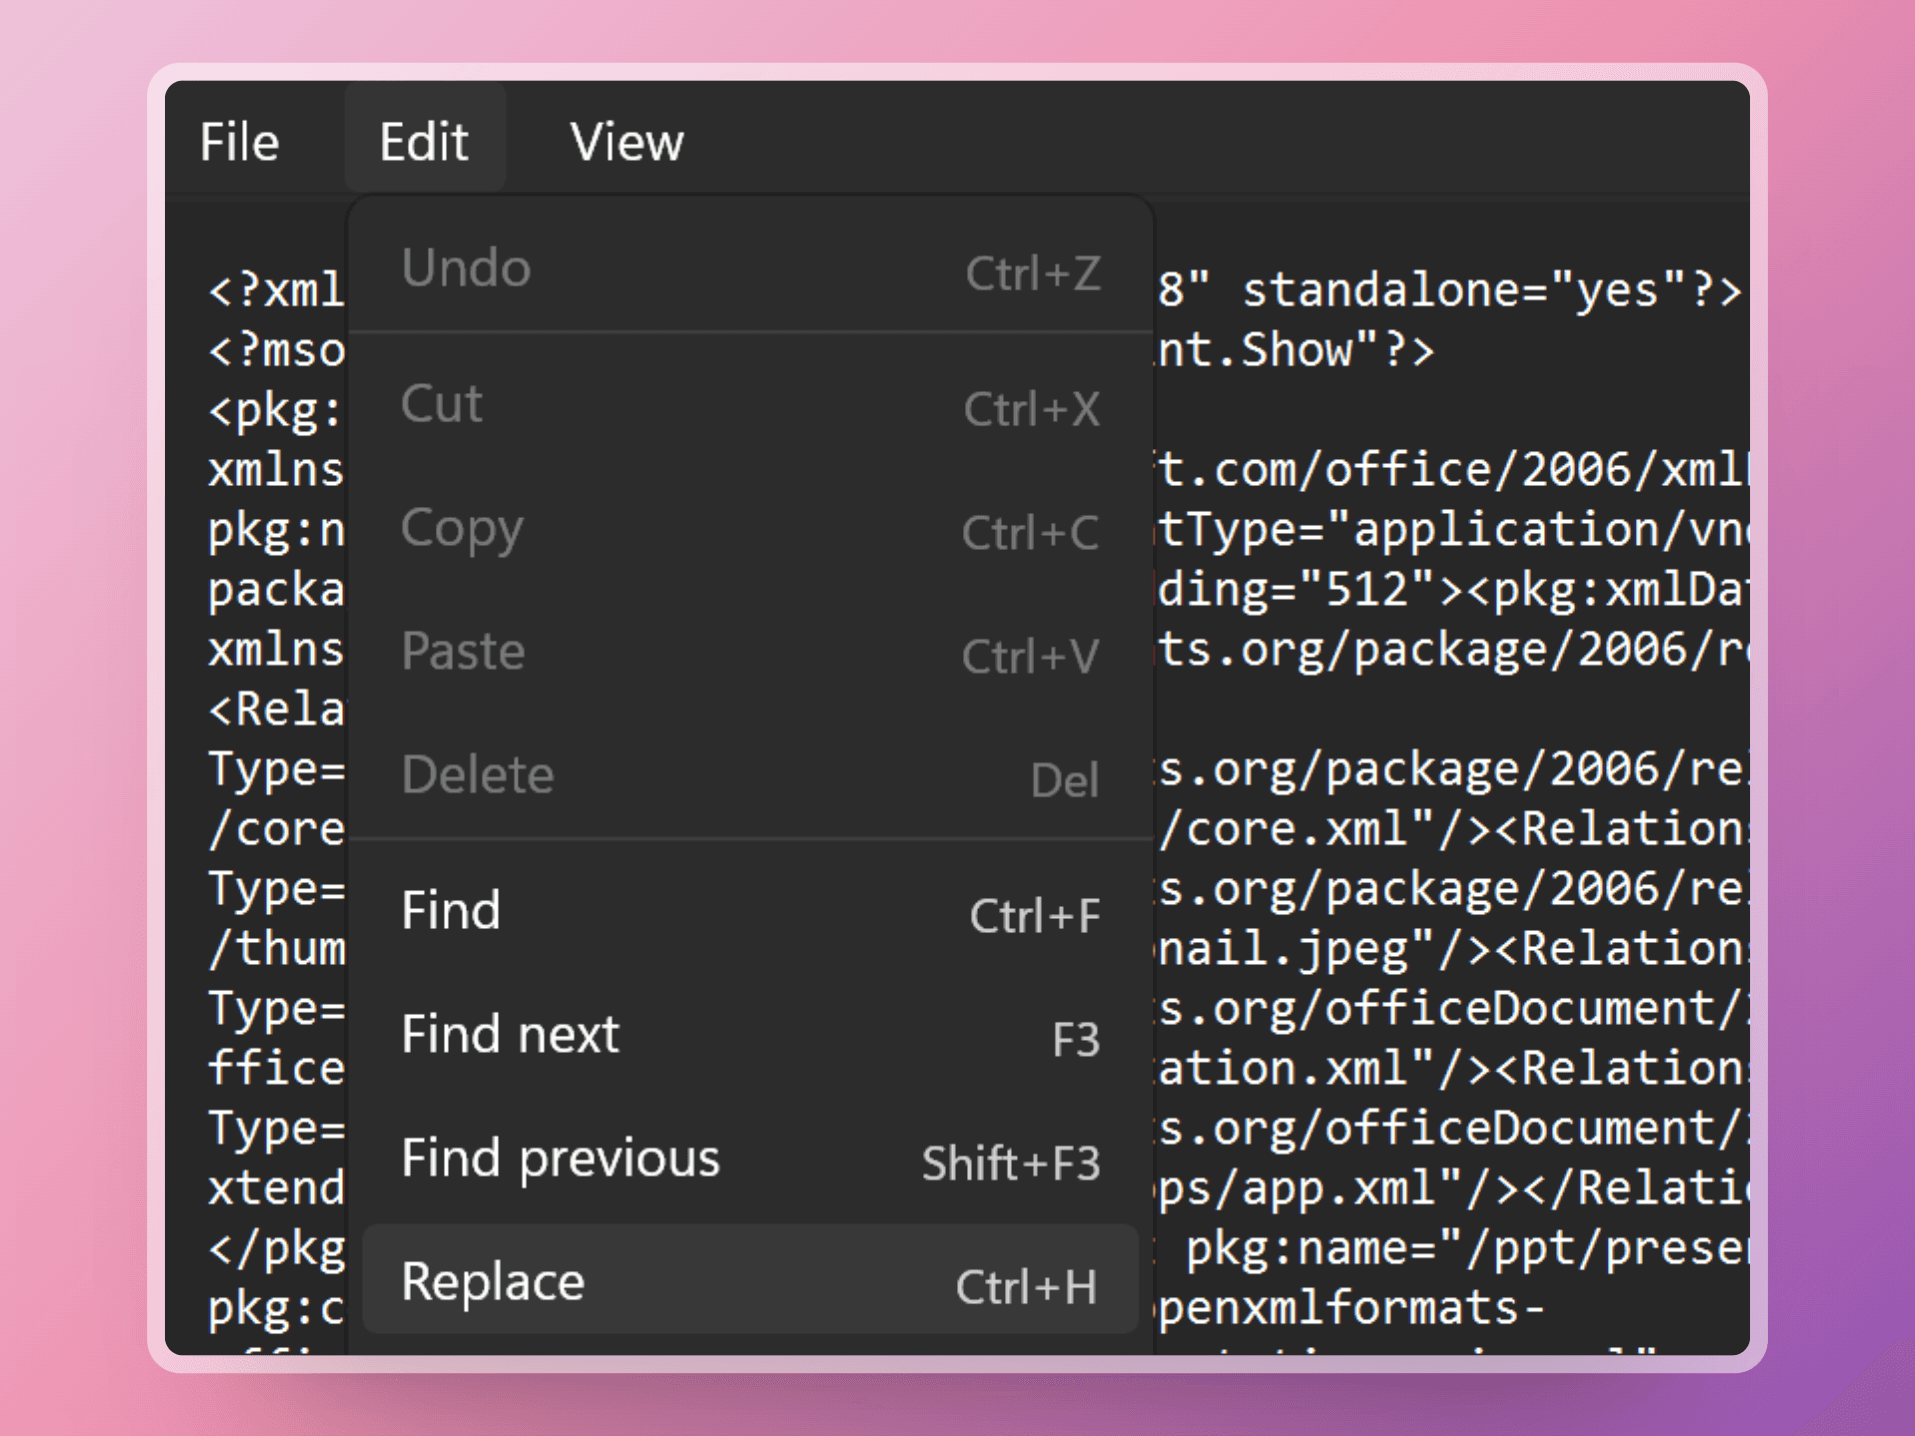
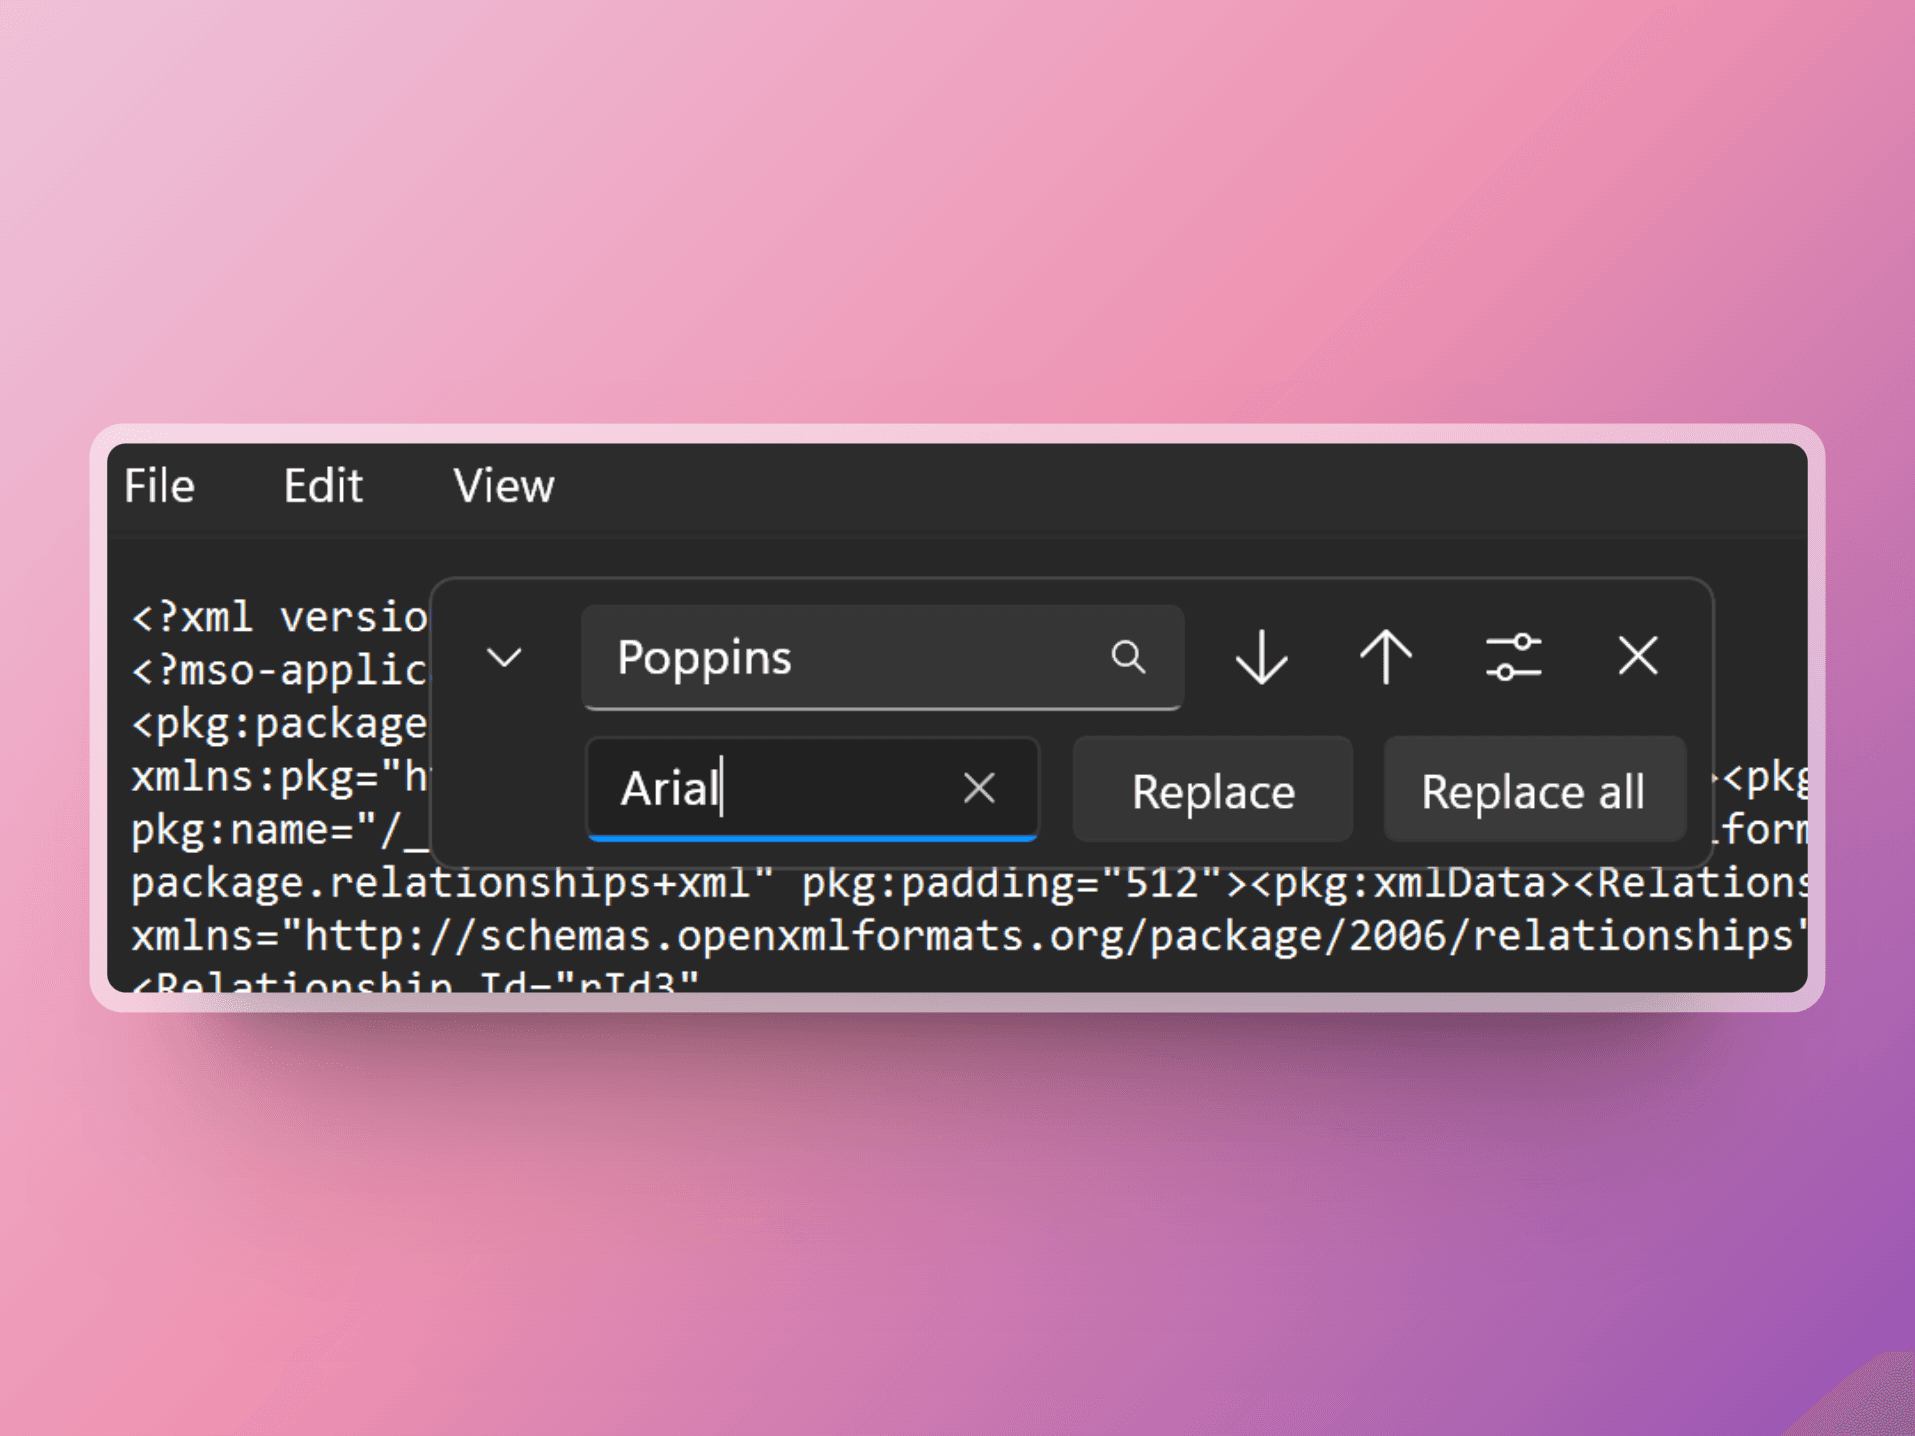
Search for the font you want to remove, e.g. "Poppins", and type in the font you want it to be replaced with, e.g. "Arial".
Click
Replace AllRepeat the same process for any other unwanted fonts.
Save the Edited XML File:
Saveyour changes in the text editor and close the editor.
Convert the XML back to PowerPoint:
Open PowerPoint.
Go to
File>Open.Select the edited XML file that you just modified.
Savethe file as aPowerPoint Presentation(*.pptx).
Et voilà! With this simple (tricky-technical-workaround) those annoying hidden fonts should now have disappeared.
If you find this workaround a bit scary, we recently came by this tool from Slidewise that can do the same thing but in a much quicker and simpler way. This is not a sponsored post, we just like recommending stuff we use from time to time. Try their free trial to judge for yourself. And if you like it, you can use the code SLDS-30 for a 30% discount.
Conclusion
By following this workaround, you can finally rid your PowerPoint presentations of those pesky embedded or hidden fonts. Whether you use the manual method or the XML trick, you’ll be able to save and share your presentations without any annoying error messages.
Sometimes fonts in our PowerPoint files seem to have a mind of their own. Even after you've tried replacing them multiple times, they just won’t disappear. These hidden or embedded fonts can cause annoying error messages when saving or sharing your presentation. But don’t worry, we have a trick that will solve this issue once and for all.
Step-by-Step Workaround to Replace Stubborn Fonts
Let’s say you have a presentation with two fonts: Arial and Poppins. You only want to keep Arial, but Poppins won’t go away despite your efforts to replace it. Here’s a detailed workaround to fix this.
Basic Font Replacement
Before we dive into the advanced workaround, try the basic font replacement method:

Replace Fonts:
Go to the
Hometab.Click on
Replacein theEditinggroup.Select
Replace Fonts.Replace Poppins with Arial.
If this doesn’t work, proceed with the XML method below.
Workaround Method: Using XML to Remove Stubborn Fonts
First of all,
create a backupof your PowerPoint presentation (just in case something goes wrong).Save the Presentation as an XML File:
Open your PowerPoint file.
Go to
File>Save As.Choose a location and set the file type to
PowerPoint XML Presentation (*.xml).Savethe file.

Edit the XML File:
Close your PowerPoint file
Open the saved XML filein a text editor like Microsoft Notepad (right-click the XML file and open in Notepad).Once opened (it looks a bit scary but don't worry), go to
Replaceunder the Edit tab,

Search for the font you want to remove, e.g. "Poppins", and type in the font you want it to be replaced with, e.g. "Arial".
Click
Replace AllRepeat the same process for any other unwanted fonts.

Save the Edited XML File:
Saveyour changes in the text editor and close the editor.
Convert the XML back to PowerPoint:
Open PowerPoint.
Go to
File>Open.Select the edited XML file that you just modified.
Savethe file as aPowerPoint Presentation(*.pptx).
Et voilà! With this simple (tricky-technical-workaround) those annoying hidden fonts should now have disappeared.
If you find this workaround a bit scary, we recently came by this tool from Slidewise that can do the same thing but in a much quicker and simpler way. This is not a sponsored post, we just like recommending stuff we use from time to time. Try their free trial to judge for yourself. And if you like it, you can use the code SLDS-30 for a 30% discount.
Conclusion
By following this workaround, you can finally rid your PowerPoint presentations of those pesky embedded or hidden fonts. Whether you use the manual method or the XML trick, you’ll be able to save and share your presentations without any annoying error messages.
Sometimes fonts in our PowerPoint files seem to have a mind of their own. Even after you've tried replacing them multiple times, they just won’t disappear. These hidden or embedded fonts can cause annoying error messages when saving or sharing your presentation. But don’t worry, we have a trick that will solve this issue once and for all.
Step-by-Step Workaround to Replace Stubborn Fonts
Let’s say you have a presentation with two fonts: Arial and Poppins. You only want to keep Arial, but Poppins won’t go away despite your efforts to replace it. Here’s a detailed workaround to fix this.
Basic Font Replacement
Before we dive into the advanced workaround, try the basic font replacement method:

Replace Fonts:
Go to the
Hometab.Click on
Replacein theEditinggroup.Select
Replace Fonts.Replace Poppins with Arial.
If this doesn’t work, proceed with the XML method below.
Workaround Method: Using XML to Remove Stubborn Fonts
First of all,
create a backupof your PowerPoint presentation (just in case something goes wrong).Save the Presentation as an XML File:
Open your PowerPoint file.
Go to
File>Save As.Choose a location and set the file type to
PowerPoint XML Presentation (*.xml).Savethe file.

Edit the XML File:
Close your PowerPoint file
Open the saved XML filein a text editor like Microsoft Notepad (right-click the XML file and open in Notepad).Once opened (it looks a bit scary but don't worry), go to
Replaceunder the Edit tab,

Search for the font you want to remove, e.g. "Poppins", and type in the font you want it to be replaced with, e.g. "Arial".
Click
Replace AllRepeat the same process for any other unwanted fonts.

Save the Edited XML File:
Saveyour changes in the text editor and close the editor.
Convert the XML back to PowerPoint:
Open PowerPoint.
Go to
File>Open.Select the edited XML file that you just modified.
Savethe file as aPowerPoint Presentation(*.pptx).
Et voilà! With this simple (tricky-technical-workaround) those annoying hidden fonts should now have disappeared.
If you find this workaround a bit scary, we recently came by this tool from Slidewise that can do the same thing but in a much quicker and simpler way. This is not a sponsored post, we just like recommending stuff we use from time to time. Try their free trial to judge for yourself. And if you like it, you can use the code SLDS-30 for a 30% discount.
Conclusion
By following this workaround, you can finally rid your PowerPoint presentations of those pesky embedded or hidden fonts. Whether you use the manual method or the XML trick, you’ll be able to save and share your presentations without any annoying error messages.
Sometimes fonts in our PowerPoint files seem to have a mind of their own. Even after you've tried replacing them multiple times, they just won’t disappear. These hidden or embedded fonts can cause annoying error messages when saving or sharing your presentation. But don’t worry, we have a trick that will solve this issue once and for all.
Step-by-Step Workaround to Replace Stubborn Fonts
Let’s say you have a presentation with two fonts: Arial and Poppins. You only want to keep Arial, but Poppins won’t go away despite your efforts to replace it. Here’s a detailed workaround to fix this.
Basic Font Replacement
Before we dive into the advanced workaround, try the basic font replacement method:

Replace Fonts:
Go to the
Hometab.Click on
Replacein theEditinggroup.Select
Replace Fonts.Replace Poppins with Arial.
If this doesn’t work, proceed with the XML method below.
Workaround Method: Using XML to Remove Stubborn Fonts
First of all,
create a backupof your PowerPoint presentation (just in case something goes wrong).Save the Presentation as an XML File:
Open your PowerPoint file.
Go to
File>Save As.Choose a location and set the file type to
PowerPoint XML Presentation (*.xml).Savethe file.

Edit the XML File:
Close your PowerPoint file
Open the saved XML filein a text editor like Microsoft Notepad (right-click the XML file and open in Notepad).Once opened (it looks a bit scary but don't worry), go to
Replaceunder the Edit tab,

Search for the font you want to remove, e.g. "Poppins", and type in the font you want it to be replaced with, e.g. "Arial".
Click
Replace AllRepeat the same process for any other unwanted fonts.

Save the Edited XML File:
Saveyour changes in the text editor and close the editor.
Convert the XML back to PowerPoint:
Open PowerPoint.
Go to
File>Open.Select the edited XML file that you just modified.
Savethe file as aPowerPoint Presentation(*.pptx).
Et voilà! With this simple (tricky-technical-workaround) those annoying hidden fonts should now have disappeared.
If you find this workaround a bit scary, we recently came by this tool from Slidewise that can do the same thing but in a much quicker and simpler way. This is not a sponsored post, we just like recommending stuff we use from time to time. Try their free trial to judge for yourself. And if you like it, you can use the code SLDS-30 for a 30% discount.
Conclusion
By following this workaround, you can finally rid your PowerPoint presentations of those pesky embedded or hidden fonts. Whether you use the manual method or the XML trick, you’ll be able to save and share your presentations without any annoying error messages.
Sometimes fonts in our PowerPoint files seem to have a mind of their own. Even after you've tried replacing them multiple times, they just won’t disappear. These hidden or embedded fonts can cause annoying error messages when saving or sharing your presentation. But don’t worry, we have a trick that will solve this issue once and for all.
Step-by-Step Workaround to Replace Stubborn Fonts
Let’s say you have a presentation with two fonts: Arial and Poppins. You only want to keep Arial, but Poppins won’t go away despite your efforts to replace it. Here’s a detailed workaround to fix this.
Basic Font Replacement
Before we dive into the advanced workaround, try the basic font replacement method:

Replace Fonts:
Go to the
Hometab.Click on
Replacein theEditinggroup.Select
Replace Fonts.Replace Poppins with Arial.
If this doesn’t work, proceed with the XML method below.
Workaround Method: Using XML to Remove Stubborn Fonts
First of all,
create a backupof your PowerPoint presentation (just in case something goes wrong).Save the Presentation as an XML File:
Open your PowerPoint file.
Go to
File>Save As.Choose a location and set the file type to
PowerPoint XML Presentation (*.xml).Savethe file.

Edit the XML File:
Close your PowerPoint file
Open the saved XML filein a text editor like Microsoft Notepad (right-click the XML file and open in Notepad).Once opened (it looks a bit scary but don't worry), go to
Replaceunder the Edit tab,

Search for the font you want to remove, e.g. "Poppins", and type in the font you want it to be replaced with, e.g. "Arial".
Click
Replace AllRepeat the same process for any other unwanted fonts.

Save the Edited XML File:
Saveyour changes in the text editor and close the editor.
Convert the XML back to PowerPoint:
Open PowerPoint.
Go to
File>Open.Select the edited XML file that you just modified.
Savethe file as aPowerPoint Presentation(*.pptx).
Et voilà! With this simple (tricky-technical-workaround) those annoying hidden fonts should now have disappeared.
If you find this workaround a bit scary, we recently came by this tool from Slidewise that can do the same thing but in a much quicker and simpler way. This is not a sponsored post, we just like recommending stuff we use from time to time. Try their free trial to judge for yourself. And if you like it, you can use the code SLDS-30 for a 30% discount.
Conclusion
By following this workaround, you can finally rid your PowerPoint presentations of those pesky embedded or hidden fonts. Whether you use the manual method or the XML trick, you’ll be able to save and share your presentations without any annoying error messages.
Sometimes fonts in our PowerPoint files seem to have a mind of their own. Even after you've tried replacing them multiple times, they just won’t disappear. These hidden or embedded fonts can cause annoying error messages when saving or sharing your presentation. But don’t worry, we have a trick that will solve this issue once and for all.
Step-by-Step Workaround to Replace Stubborn Fonts
Let’s say you have a presentation with two fonts: Arial and Poppins. You only want to keep Arial, but Poppins won’t go away despite your efforts to replace it. Here’s a detailed workaround to fix this.
Basic Font Replacement
Before we dive into the advanced workaround, try the basic font replacement method:

Replace Fonts:
Go to the
Hometab.Click on
Replacein theEditinggroup.Select
Replace Fonts.Replace Poppins with Arial.
If this doesn’t work, proceed with the XML method below.
Workaround Method: Using XML to Remove Stubborn Fonts
First of all,
create a backupof your PowerPoint presentation (just in case something goes wrong).Save the Presentation as an XML File:
Open your PowerPoint file.
Go to
File>Save As.Choose a location and set the file type to
PowerPoint XML Presentation (*.xml).Savethe file.

Edit the XML File:
Close your PowerPoint file
Open the saved XML filein a text editor like Microsoft Notepad (right-click the XML file and open in Notepad).Once opened (it looks a bit scary but don't worry), go to
Replaceunder the Edit tab,

Search for the font you want to remove, e.g. "Poppins", and type in the font you want it to be replaced with, e.g. "Arial".
Click
Replace AllRepeat the same process for any other unwanted fonts.

Save the Edited XML File:
Saveyour changes in the text editor and close the editor.
Convert the XML back to PowerPoint:
Open PowerPoint.
Go to
File>Open.Select the edited XML file that you just modified.
Savethe file as aPowerPoint Presentation(*.pptx).
Et voilà! With this simple (tricky-technical-workaround) those annoying hidden fonts should now have disappeared.
If you find this workaround a bit scary, we recently came by this tool from Slidewise that can do the same thing but in a much quicker and simpler way. This is not a sponsored post, we just like recommending stuff we use from time to time. Try their free trial to judge for yourself. And if you like it, you can use the code SLDS-30 for a 30% discount.
Conclusion
By following this workaround, you can finally rid your PowerPoint presentations of those pesky embedded or hidden fonts. Whether you use the manual method or the XML trick, you’ll be able to save and share your presentations without any annoying error messages.


Figma Slides: A new presentation tool taking on PowerPoint and co
Figma Slides: A new presentation tool taking on PowerPoint and co
Figma Slides: A new presentation tool taking on PowerPoint and co
Figma Slides: A new presentation tool taking on PowerPoint and co
Figma Slides: A new presentation tool taking on PowerPoint and co
Figma Slides: A new presentation tool taking on PowerPoint and co
Presentation tools
Presentation tools
Presentation tools
Presentation tools
Presentation tools


How to prepare a great conference keynote presentation
How to prepare a great conference keynote presentation
How to prepare a great conference keynote presentation
How to prepare a great conference keynote presentation
How to prepare a great conference keynote presentation
How to prepare a great conference keynote presentation
Public speaking
Public speaking
Public speaking
Public speaking
Public speaking